

Discover our top 10 vegetables to plant in Autumn. Despite these lovely warm days, cooler weather is on the way. And as the days shorten, our thoughts turn from summer vegetables like zucchini, cucumber, and tomato, to preparing our garden beds for autumn planting. And there are so many wonderful vegetables you can plant in autumn that you can harvest during winter.
Vegetables to Plant in Autumn Advice
Autumns tend to be milder weather (at least if we’re lucky in Melbourne), making it easier to grow and harvest fresh crops. Once you’ve decided on your autumn crops you have a choice: either plant from seed if you’re patient or from seedlings if you want a bit of a head start. To keep your harvest coming over a longer period, and to avoid everything ripening all at once, plant your crops in groupings 2 to 3 weeks apart.
Below we will discuss the best way to grow each of our favourite autumn vegetables.
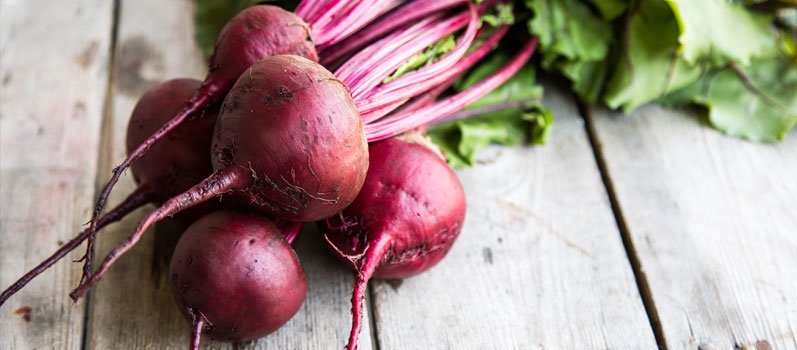
1. Beetroot
Beetroots are fantastic vegetables for winter and are easy to grow in your home garden because they don’t require much room.
Potting & Soil
Soil is extremely important when it comes to growing beetroot. They grow best in deep, well-drained soil. Avoid clay as it’s too heavy for large roots to grow. If you have clay soil, it needs to be mixed with organic matter to soften the clay out. Otherwise, the hard soil can cause the roots of your beets to be too tough. The best soil for beetroot is sandy soil.
Temperature & Humidity
Beetroot like cooler weather, so it’s best to plant them in cooler months of autumn. Plant the seeds or seedlings about 2.5 to 5cm apart in a row. If growing from the seed, cover lightly with loose soil and then sprinkle with water. You should see seedlings sprouting within 7 to 14 days. When it comes to planting seedlings, refer to the instructions on the tag as seedlings come in a wide range of different ages.
Light
If you want a continuous supply of beets, plant several batches of seeds or seedlings 3 weeks apart from each other. Beetroot likes partial shade but don’t plant it in the same garden bed as a tree as you run the risk of the roots tanging up with the beet’s roots. Beetroot roots can reach around 8 to 15cm long, so this can cause some serious tangles.
Harvest
Harvest beetroot 7 to 8 weeks after planting, when the beets have reached your desired size. Simple dig them, gently, up from the soil and enjoy. You can also harvest the beetroot greens. These are best harvested when the beetroot is young and the roots are small.
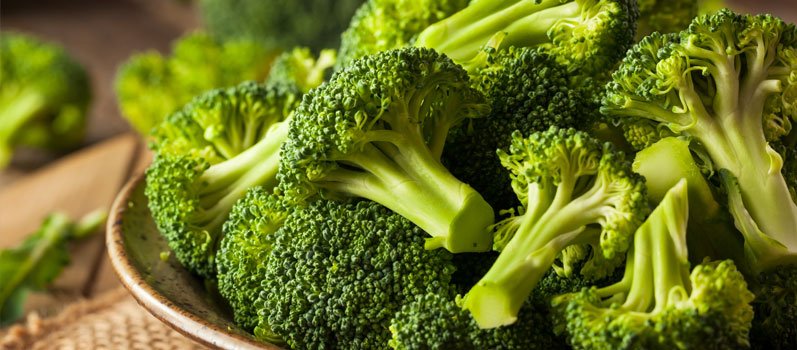
2. Broccoli/Broccolino
Broccoli is an amazing, nutrient-rich vegetable that is often overlooked when it comes to home gardens. These are cool-season plants, and broccoli seeds take about 4-7 days to germinate, so direct seed in mid-autumn for a good winter crop. If you choose to grow broccoli seedlings indoors, you need to make sure they get plenty of light to prevent the plants from getting leggy. If long stems develop, you will need to try potting the seedlings deeper, up to the first leaves, and provide more light. Then wait until frost free weather to plant the seedlings in your garden.
Potting & Soil
Before planting outside, harden your broccoli plants by gradually exposing your seedlings to direct sunlight and wind. When planting, space broccoli plants 12-14 inches apart; the more space between the plants, the bigger the central heads can grow. Plant in full sun and rich, organic soil. Broccoli prefers slightly acidic soil and a good fertiliser in order to maintain steady growth. It also prefers moist but not soggy soil which is why we recommend mulching to control both weeds and soil moisture levels.
Harvest
The edible part of your broccoli plant is basically the unopened flower. Ideally, the central head of the plant should be harvested when it’s fully developed but before any individual buds open and produce small, yellow flowers. If any of the buds bloom, harvest the plant immediately. If the broccoli plant has flowered (which is known as bolting or bolted) then it’s too late to pick your broccoli.
To harvest broccoli, take a sharp knife and remove the central flower head during the cool, morning hours. Refrigerate as soon as possible. Leaving the rest of the plant in the ground encourages the side shoots (the smaller flower heads) to develop. While this provides smaller broccoli than the main head, it allows you to keep harvesting broccoli for a longer period.
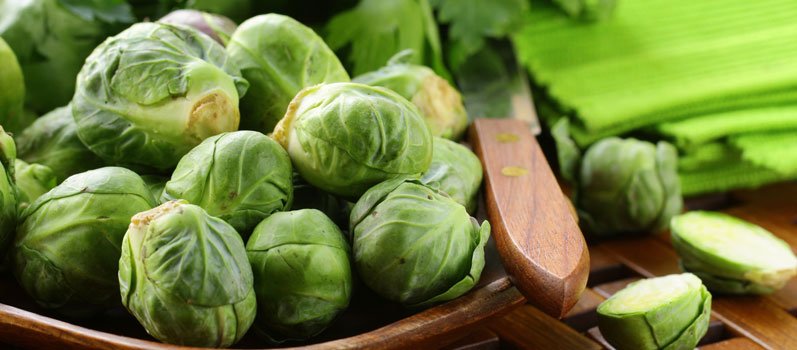
3. Brussels Sprouts
Brussels sprouts are nutritious vegetables that have unfortunately been vilified by children’s books and TV. But these delicious vegetables are best eaten when freshly picked from your own garden.
Temperature & Humidity
Growing Brussels sprouts is similar to growing kale or cabbage. They grow best in cold temperatures and take a long time to mature. It is best to plant them in early autumn, at least 3 months before the first frost. You’re also best off growing sprouts from transplants rather than from seeds. This allows your seedlings to develop in a cool, shaded environment. Plant about 36 inches apart in a good, nitrogen rich soil.
Water
In fact, Brussels sprouts need plenty of nutrients and water in order to produce a good crop. You should never let your sprout beds become too dry as this will stress your crops and in return, produce a poor harvest.
Harvest
A matured Brussels sprout plant will look like a tall, green tower with knobs and leaves. The knobs will develop into the sprouts. Once the knobs have reached 1-1.5 inches wide and are firm when you squeeze them, they are ready to harvest. Harvest from the bottom to the top of the plant. This is because the Brussels sprouts will be ready from the bottom first. Like broccoli, harvest with a sharp knife and cut vertically from the stem.
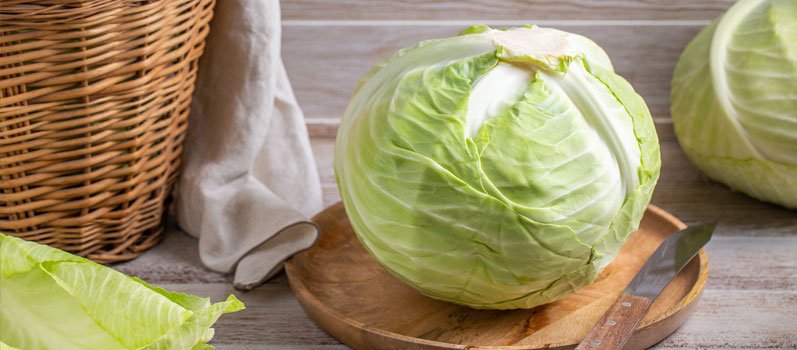
4. Cabbage
Cabbage is easy to grow and extremely hardy, making them a great option for any garden. Growing cabbages is easy thanks to their robust nature, it prefers fertile soil and likes sun or partial shade. The planting season for cabbage is fairly long and with so many varieties, you can plant at staggered intervals, so you have a continuous harvest.
Potting & Soil
When planting, place seedlings 12-24 inches apart to give them plenty of room for growing larger heads of cabbage. If you are sowing your cabbage from seed, then you need soil that has a good 6-6.8 pH balance. You also need to keep the seeds moist and thin the young seedling in order to give them space to grow. Good, fertile soil gives cabbages a good start and adds nitrogen to the soil, after the cabbages are established, will help them mature.
Even though cabbage roots are fairly shallow it’s important to keep the soil moist so the vegetables will bed juicy and sweet. Cabbage makes a great fall crop as it doesn’t like temperatures over 24 C.
Harvest
Harvest cabbage when they have reached the size you like. Simply cut the head of the cabbage from the base. Don’t wait until your cabbage head splits as a split head cabbage will attract disease and other pests. When you’ve finished harvesting your cabbage, remove the entire plant and root system from the soil.

5. Cauliflower
Cauliflower is one of the easiest vegetables to grow and does well when planted alongside other similar plants like kale, broccoli, and turnips. Cauliflower is a cool season vegetable that loves temperatures around 16-18 C. This makes them the perfect autumn crop to grow in your personal garden.
Potting & Soil
Seed indoors or directly into the garden in April. But if you are transplanting from indoors to garden, ensure you avoid planting during frost dates. Harden seedlings off before transplanting outside by slowly exposing them to harsher and harsher weather. Keep seedlings moist and plant them at least 2 feet apart and in rows around 30 inches apart. Fertilise when planting with a liquid fertiliser based on the manufacturers’ instructions.
Once the plants are established, start using a nitrogen rich compost instead. Cauliflower is more likely to bolt than other vegetables, so keep the plants moist but not soggy. Mulch around seedlings and plants to keep weeds back and retain moisture.
Harvest
When the head of the cauliflower is about golf ball sized, tie the outer leaves loosely over the developing head with soft nylon or cloth. This will protect your cauliflower from the sun and stop it from turning yellow. Cauliflower is ready to harvest a week or two after covering the head. Check the heads every couple of days and harvest when the heads are 6 inches or bigger but before the flower begins to separate. Use a large, sharp knife to cut the cauliflower from the plant, leaving at least one set of leaves to protect the head.
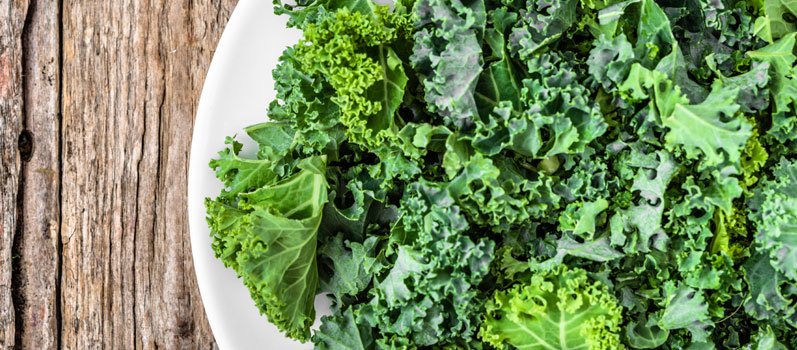
6. Kale
Kale, one of the most popular superfoods, is rich in iron and vitamins including vitamin A and C. Kale is not only great on your plate, but it is also great for your garden. They are extremely robust plants that can adapt to many different gardens and soil types.
Temperature & Humidity
Although kale is known to be versatile, it does need to be properly planted for the healthiest growth. Kale likes well-drained soil in sunny locations, but are happy in the shade, too. So choose your garden space wisely as kale grows best when planted after the soil reaches 16-18 C as hot weather can turn it bitter. Start planting in early autumn, covering the seeds with about a centimetre of soil. Do NOT cultivate around the seeds until the seedlings appear, then only do so if absolutely necessary to prevent disturbing the roots.
Maintenance
Keep the ground well-watered and, as the kale grows, you can hoe the soil shallowly around the plants to remove any weeds starting to grow. Kale matures in around 2 months and, since they take so little time, you can plant a succession of kale so you can continue harvesting for at least 6 months. Being able to pick kale all autumn and into winter is definitely a plus when it comes to this hardy vegetable.
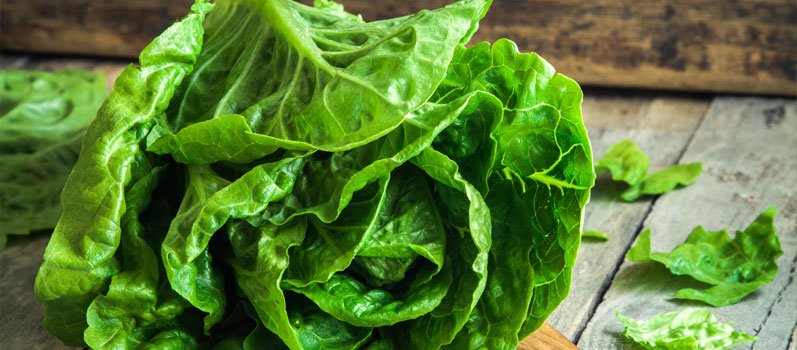
7. Lettuce
There is a reason lettuce is grown around the world. It is an easy and inexpensive way to put fresh, gourmet salad on the table. And as a cool season vegetable, it’s also perfect for autumn planting. Lettuce is perfect for Australia as it doesn’t mind warmer autumns and winters, meaning it can be grown outdoors from autumn well into winter. However, as soon as warmer weather starts, lettuce will start to bolt, so you will find it a challenge if you want to try and grow lettuce year. Direct seed lettuce into the ground in autumn. Plant in succession and in different varieties, so you have a wide variety of lettuce to harvest throughout autumn and winter.
Temperature & Humidity
Lettuce prefers cool, moist conditions and the seedlings can tolerate a light frost. These plants grow best in temperatures between 7-18 C. Lettuce tastes best and the leaves are most tender when it is allowed to grow quickly. In order to do so, work an organic compost or high nitrogen fertiliser into the garden before planting to encourage rapid leaf growth. Due to its small seed size, it’s better to sprinkle lettuce seeds on top of fine soil, then lightly cover them with a thin layer of dirt. Consider covering with a plastic row cover, cold frame, or even a scrap window pane to protect your seeds from being washed away or scratched up by birds.
Water
Lettuce should have about 1-2 inches of rain or extra water a week. Space your plants 8-12 inches apart to allow them plenty of space to mature. Planting lettuce in full sun will generate leaf production faster but a little shade is better to prevent the plant from bolting. Planting between taller vegetable crops like tomatoes and corn will provide the perfect shade. And you can save on space in small gardens.
Harvest
Lettuce can be harvested once the outer leaves reach a useable size. Picking the young, tender leaves will also allow the inner leave to continue growing. For crisp lettuce, harvest first thing in the morning. Wash the leaves in cold water and dry with paper towel. Place the lettuce in a plastic bag and store in the fridge. Harvest by cutting straight across the plant 1-2 inches above the soil level. Leave the growing point to all for further leaves to develop. Don’t let lettuce mature too much or it will become bitter.
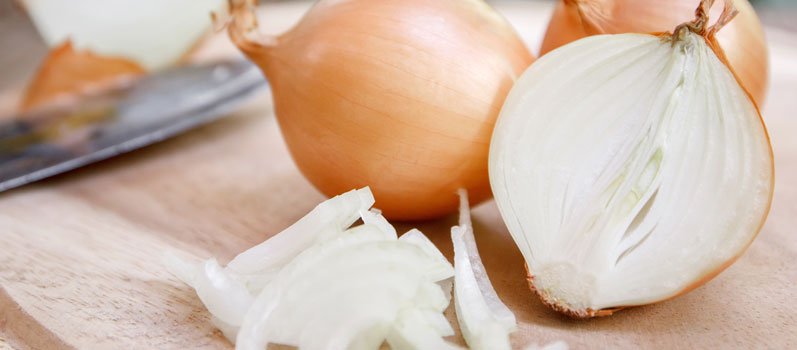
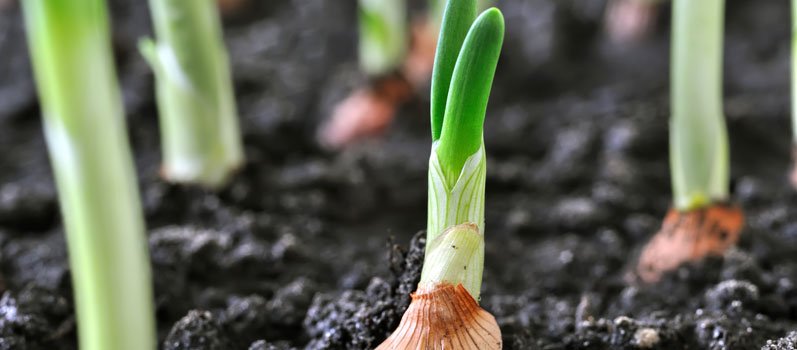
8. Onion
Onions are amazingly good for us. They are high in energy, water content, and low in calories. They can also lower blood pressure, increase circulation, and prevent blood clotting.
You can grow onions from seeds, plants, or sets. Seeds can be sown in the garden in very early autumn, so you can harvest in winter and spring. The seeds develop in summer once the flowers stop blooming. Onion plants can be bought at local garden centres or also started from seeds. Onion sets are also grown from seed but are pulled when they’re the size of marbles and stored until the next spring to be planted. Sets and plants are the easiest and most popular ways of growing onions but for the biggest onions, it is best to grow from seed.
Potting & Soil
To get big onions, plant early with a good helping of fertiliser or compost. Or you can sow your seeds into trays and left in a cool location until the seedlings reach about 1-2 inches tall. At this point, they can be placed in deep, biodegradable pots, filled with loose, composted soil. When planted, the pots will decompose which will encourage a second root system nearer the surface. This will help produce larger onions.
Onion plants and onion sets, however, will require loose soil and should be planted end of February – end of March. Dig a shallow trench, working in compost or fertiliser. Plant onions about an inch deep and around 4-5 inches apart. Wider spacing is easier to control and allows you to weed easier. Once the onions start to swell, make sure they stay below ground. They will continue to increase in size until the tops begin to fade. Once they have completely faded and fallen over, you can pull your onions and leave them in the sun to dry for several days before storing them in a cool, dry area.
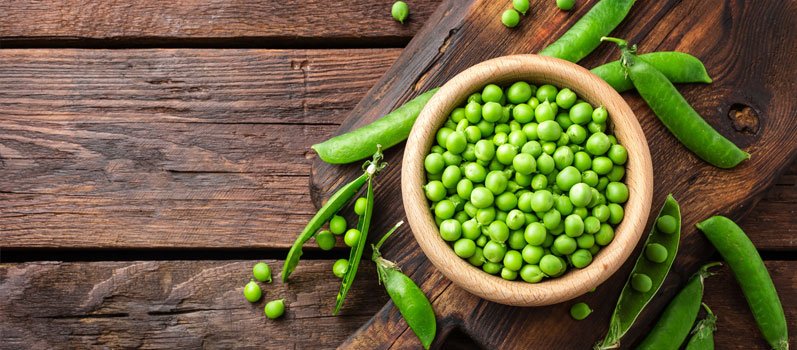
9. Peas
We all know that peas are tasty and nutritious, they are also incredibly easy to grow. There are a wide variety of peas you can grow, from shelling peas to those with edible pods. All are delicious and only need a little care when it came to planting and growing for a successful harvest.
Light
Peas need full sun and soil that drains well. They need far less fertilising than other vegetables so it is enough to add a little compost to the soil before planting. If you’re growing vining peas, choose a location where you can grow them up a trellis or other structure. Peas struggle in hot months so ensure you plant in cool weather, at about 2.5cm deep. Before planting, treat peas with an inoculant from your local garden store, if you’ve never planted peas in that soil. An inoculant is a natural bacteria that helps your peas convert nitrogen from the air into a form the plant can use.
Water
Growing peas are pretty easy but they do need some maintenance throughout the growing season. Water peas on when there is not enough rain to provide about an inch of water a week. Use plenty of mulch around the growing peas to keep moisture in and help minimise weed growth. To prevent disease, only ever water at the base of the plant, directly on the soil. And ensure the pea plants have plenty of space between them for proper airflow.
Harvest
Harvesting peas at the right time is essential as they can mature quickly and become inedible. Once the pods begin to flesh out with peas, check them daily. Pick your peas as soon as the pods have reached their maximum size. When you think they’re ready, pick and eat one. The peas should be sweet, tender, and thin-skinned. They are best stored if you can get them cooled off quickly so dunk them in cold water right after harvesting then store them in the fridge, freeze, or even can.
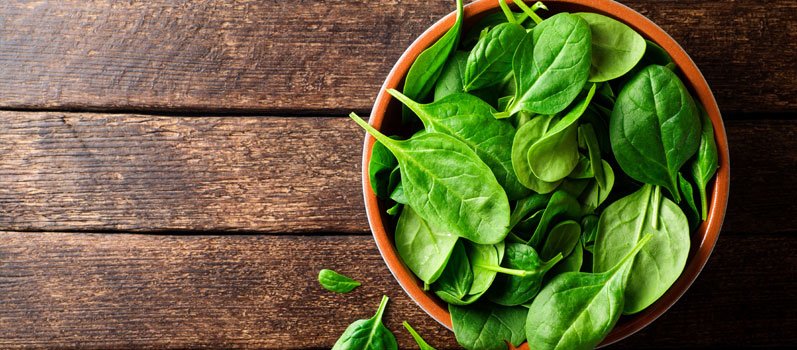
10. Spinach
Short on garden space but want to eat a healthy, balanced diet? Spinach is an amazing way to take over growing your own produce and start container gardening. Growing spinach in a container is an easy, nutrient-rich, fast-growing crop that is easy to start with when gardening. Spinach in a pot allows you to harvest as many delicious leaves you want, whenever you want them. You can grow it on a windowsill, besides your kitchen door, or even on a small apartment balcony.
Temperature & Humidity
Spinach only takes around 40-45 days to reach harvesting age. This means you can plant in succession, so you always have spinach ready on hand. It’s a cold season vegetable and will bolt in temperatures over 26 C. spinach likes containers that are 6-12 inches across in soil mixed with compost to aid with water retention. Set in full sun and thin plants as they grow so they’re 2-3 inches apart.
You can plan plant spinach alone or in conjunction with other plants like marigolds or petunias. Just be sure to leave enough space between the plants. Planting flowers will help brighten up the container and, once the spinach season ends, fill out the container until the next season.
Water
Spinach needs consistent moisture so be sure to water frequently. It is also an extremely heavy feeder so fertilise with commercial food that contains nitrogen, an organic fish emulsion, or cottonseed meal. Incorporate fertiliser into the soil prior to planting. Afterwards, feed spinach after it has been thinned. Spread around the base of the plants and gently work into the soil. But be careful not to damage the spinach’s shallow roots.
Want to know more about what vegetables to plant in Autumn? Visit your local Aumanns for helpful advice and tips from our expert team!